Quick Answer: Solving How to Clean & Waterproof Canvas Rooftop Tents: Seam Guide (2026)
Canvas rooftop tents leak at needle perforations, not through fabric. Wash with pH-neutral cleaner, dry to below 8% moisture content, then flood-test to locate wicking seams. Apply polyurethane seam sealer in 1.5 mm beads over 25 mm-wide stitch lines, cure 24 hours at 18–24 °C, and reproof annually.

Root Cause Engineering & Mechanical/Optical Principles
A canvas rooftop tent is not a waterproof membrane. It is a hygroscopic woven barrier that relies on three distinct and independently failing mechanisms: fiber swelling, surface tension management, and mechanical seam occlusion. Understanding which mechanism has failed determines whether you reach for a cleaner, a DWR spray, a urethane coating, or a seam sealer — and applying the wrong one is the single most common reason a “waterproofed” tent leaks worse than it did before treatment. For detailed technical setup and system integration, reference our analysis on calculate dynamic vs static roof rack weight for rtts.
Mechanism one: fiber swelling (the weathering-in effect). Traditional cotton duck and poly-cotton ripstop canvas (typically 260–400 gsm on rooftop tents) seals itself. When dry, the plain-weave interstices between warp and weft yarns measure roughly 20–80 u00b5m. On first wetting, cotton fibers absorb water and swell radially by 20–45% of their dry diameter, collapsing those interstices to near zero. This is why a brand-new canvas tent may mist slightly during its first rainstorm and then stop — the fabric has not failed, it has simply not completed its first swell cycle. Manufacturers call this “weathering in,” and it requires one to three full soak-and-dry cycles before the weave stabilizes.
Mechanism two: surface tension and DWR depletion. A durable water repellent finish does not block water. It lowers the fabric’s critical surface energy to roughly 10–20 mN/m, below water’s surface tension of 72 mN/m at 20 °C, so droplets bead at contact angles above 90° and roll off before hydrostatic pressure can drive them into the weave. DWR depletes through three vectors: abrasion from the folded stowage cycle, UV photodegradation of the fluoropolymer or silicone chain, and — most insidiously — contamination. Body oils, roadway diesel particulate, tree sap, and residual detergent surfactant all raise the fabric’s surface energy. A dirty tent wets out even when its DWR chemistry is chemically intact. This is the critical diagnostic insight most owners miss: cleaning precedes waterproofing, always. Spraying a reproofer onto a contaminated shell bonds the treatment to the dirt layer, not the fiber, and the whole film sheds within one season.
Mechanism three: seam perforation. This is the dominant real-world failure and the reason this guide exists. Every industrial lockstitch seam on a rooftop tent punches a hole through the fabric. A standard size 18–22 needle running at 3–4 mm stitch pitch creates a perforation of roughly 0.9–1.1 mm diameter every 3.5 mm along the seam. A single 2 m panel seam therefore contains roughly 570 discrete holes, each of them a capillary pathway. Cotton thread swells and partially self-seals; polyester and bonded nylon thread — used almost universally on modern rooftop tents for UV durability — does not swell at all. The thread fills perhaps 70% of the hole volume, leaving an annular gap that wicks water by capillary action regardless of how perfect the surrounding DWR is.
Capillary rise through that annulus follows the Jurin relation, where rise height is inversely proportional to the effective pore radius. For a 0.1 mm residual annular gap, theoretical capillary rise exceeds 140 mm — more than enough to carry water from an exterior seam, through the fabric plane, and onto the interior face where it forms the characteristic slow drip that owners mistake for condensation. Distinguishing seam wicking from condensation is a core diagnostic step covered in the procedure below.
A fourth consideration specific to rooftop tents: stress concentration at the hinge and ladder-mount seams. Unlike a ground tent, a rooftop tent folds along a fixed hinge line and bears dynamic load from the ladder and from highway-speed airflow. Seams within 150 mm of the hinge experience repeated flexural cycling that fatigues both the thread and any cured sealant film. Rigid sealants crack here. Any product applied to a hinge seam must retain elongation above roughly 300% after cure, which rules out most hard-setting urethanes in favor of flexible polyurethane or silicone-based chemistries matched to the base fabric.
Chemistry compatibility is non-negotiable and is where most DIY attempts fail outright. Silicone-impregnated fabrics (silnylon, silpoly — common on rainfly extensions and annex panels) will not accept polyurethane sealer; the urethane cures into a film that peels off in sheets within weeks. Conversely, silicone sealer applied to a PU-coated or untreated cotton canvas seam provides poor substrate penetration. Identify your substrate before purchasing sealant. Standardized test methods for hydrostatic resistance and water repellency — the AATCC and ASTM protocols that manufacturers cite on spec sheets — are published through ASTM International Standards, and reading a tent’s quoted hydrostatic head figure against the correct method is the only way to compare products meaningfully.
Failure Mode Diagnostic Matrix
| Observed Symptom | Engineering Failure Mode | Diagnostic Measurement & Tolerance | Correct Remedy | Difficulty |
|---|---|---|---|---|
| Fine mist inside during heavy rain; fabric looks uniformly damp | Incomplete weathering-in; weave interstices not yet collapsed | Tent is under 3 wet/dry cycles old. Fabric moisture meter reads >14% after soak, returns to <8% dry | No treatment. Complete 2–3 soak-and-dry cycles before judging | Trivial |
| Water soaks flat into fabric instead of beading; dark wet patches spread | DWR depletion or surfactant contamination | Spray test: droplets must bead at contact angle >90° and persist >60 s. Wet-out within 10 s = failed | Deep clean with pH-neutral, surfactant-free cleaner, then reapply DWR | Low |
| Discrete drips tracking along a stitch line; interior stain follows seam geometry | Seam perforation wicking — annular capillary gap around thread | Flood test seam at 15–20 kPa spray. Any bead forming within 10 min = failed seam | Clean, degrease, apply seam sealer in 1.5 mm bead, 25 mm coverage width | Moderate |
| Seam tape lifting, curling, or flaking in strips | Hot-melt tape adhesive thermal/hydrolytic failure | Peel force below ~2 N/25 mm; tape lifts under light thumbnail pressure | Strip tape fully, scrub adhesive residue, apply liquid sealer to bare seam | Moderate |
| Sticky, tacky, or orange-peel texture on interior PU coating | Polyurethane hydrolysis from long-term damp storage | Tack test: surface transfers residue to a gloved finger at 20 °C | Strip degraded PU with isopropyl alcohol, recoat with urethane tent coating | High |
| Uniform interior wetness on cold mornings; no seam correlation; walls cold to touch | Condensation, not ingress — dew point reached on interior surface | Interior RH >75% with surface temp within 2 °C of dew point | Increase cross-ventilation; sealing will make this worse, not better | Low |
| Leak concentrated near hinge or ladder mount after a season of use | Flexural fatigue cracking of cured sealant or thread abrasion | Visual: hairline cracks in sealant film under 10× loupe; thread fuzzing | Remove cracked film, apply high-elongation (>300%) flexible sealant | Moderate |
| Black or green speckling with musty odor; fabric locally weakened | Mildew colonization degrading cellulose and the DWR layer | Tensile loss; fabric tears under <50 N hand pull at affected zone | Treat with dilute mildewcide, dry fully, reproof. Severe cases need panel replacement | High |
| Zipper line seeping on the storm cover or annex | Zipper tape stitch perforation plus absent storm flap coverage | Flood test zipper closed; seepage at tape edge within 5 min | Seal zipper tape stitch line only — never the coil; add zipper lubricant | Moderate |
| Pooling water on the tent roof or rainfly with sag | Fabric relaxation under load — hydrostatic head exceeded at pool point | Sag depth >25 mm measured at panel center under 2 L load | Re-tension guylines and poles; reduce standing water, then reproof | Low |
Step-by-Step Diagnostic & Calibration Procedure
This protocol runs in sequence. Do not skip to sealing. Roughly 40% of reported “seam leaks” turn out to be condensation or DWR contamination, and sealing a seam that is not leaking wastes product and stiffens fabric unnecessarily. Budget a full weekend: the cure windows are non-negotiable and account for most of the elapsed time.
Phase 1 — Deployment, Inspection & Baseline (60–90 minutes)
- Deploy fully on a dry day. Ambient temperature 15–27 °C, relative humidity below 65%, no direct midday sun on the work face. If the tent is mounted on the vehicle, work in shade — a dark canvas panel in direct sun reaches 50–60 °C, which flash-skins sealant before it can penetrate the stitch holes.
- Tension to specification. Extend the ladder to manufacturer angle (typically 70–80° from horizontal) and seat all spring poles. An untensioned tent sags, and sagging shifts seam geometry so that sealant applied flat will crack when the tent is later tensioned correctly.
- Map every seam. Walk the perimeter and log each seam on a sketch: roof panel joins, wall-to-floor junction, window surrounds, zipper tape lines, hinge-adjacent seams, ladder-mount reinforcement patches, and any guyline attachment points. A typical 2-person hardshell rooftop tent carries 14–22 distinct seam runs totaling 18–30 linear meters.
- Inspect under 10× magnification. Use a loupe or phone macro. You are looking for: thread fuzzing or UV chalking, lifted seam tape, hairline cracks in existing sealant, needle holes that visibly gape, and abrasion bloom where the fabric folds.
- Record a baseline bead test. Mist plain water on five locations — roof center, each wall, and the floor skirt. Photograph contact angles. Beads holding spherical form for 60 seconds indicate live DWR. Flat spreading within 10 seconds indicates wet-out and mandates the full clean-and-reproof path.
Phase 2 — Leak Localization by Controlled Flood Test (45–60 minutes)
- Station an observer inside. This is the only reliable method. Working alone, place sheets of dry kraft paper or paper towel along the interior seam lines — water marks paper instantly and holds the evidence.
- Apply calibrated spray. Use a garden hose with a fan nozzle at roughly 15–20 kPa (2–3 psi) at the fabric face — a gentle shower, not a jet. High-pressure water will force ingress through sound fabric and give false positives. Hold the nozzle 600–900 mm from the surface.
- Work section by section, bottom to top. Spray each panel for 8–10 minutes before moving on. Water tracks downward and laterally, so a leak observed low may originate 400 mm higher. Bottom-to-top sequencing isolates each zone before the one above it is wetted.
- Mark every ingress point from the inside with low-tack masking tape and a chalk marker. Mark the exterior correspondingly. Note that interior appearance often sits 50–150 mm downslope of the actual perforation.
- Rule out condensation. If interior moisture appears uniformly across cold surfaces with no seam correlation, and interior relative humidity exceeds 75% with surface temperature within 2 °C of dew point, you have condensation. Sealing will trap more moisture and worsen the problem. Increase ventilation instead.
- Dry completely before proceeding. Minimum 24 hours airing, or until a pin-type moisture meter reads below 8% at the thickest seam. Sealant applied to damp canvas will not bond; trapped moisture also drives hydrolysis of any PU coating underneath.
Phase 3 — Cleaning & Surface Preparation (2–3 hours plus 24 h dry)
- Dry-brush first. Soft-bristle brush, 100 mm width, working with the weave direction. Remove grit, pollen, and road film mechanically before introducing water, which otherwise drives particulate deeper into the weave.
- Wash with pH-neutral, surfactant-free technical cleaner at the dilution on the label — commonly 1:20 to 1:30 in warm water at 25–30 °C. Never use household laundry detergent, dish soap, bleach, or fabric softener. Residual anionic surfactant permanently raises fabric surface energy and will defeat every DWR you subsequently apply. Bleach and optical brighteners additionally attack cotton cellulose and degrade UV inhibitors.
- Agitate gently, never aggressively. Light circular motion with a soft brush. Hard scrubbing abrades the DWR layer and fibrillates cotton surface fibers, which increases wicking.
- Treat mildew separately. For speckled colonization, use a dedicated canvas mildewcide or a very dilute solution per the product label. Chlorine bleach is contraindicated: it hydrolyzes cellulose and can cost 30–50% of the fabric’s tensile strength in a single treatment.
- Rinse exhaustively. Three full rinse passes minimum, until runoff carries zero foam. Incomplete rinsing is the most common cause of a reproofing job that fails within one trip.
- Degrease seams specifically. Wipe each seam line with isopropyl alcohol (70–99%) on a lint-free cloth. This removes silicone mold release, factory lubricant, and handling oils from the stitch zone. Allow 15 minutes flash-off.
- Dry fully in open air. Deployed, out of direct intense sun, minimum 24 hours. Confirm below 8% moisture content. Never pack or seal a damp canvas tent.
Phase 4 — Seam Sealing Application (2–4 hours plus 24 h cure)
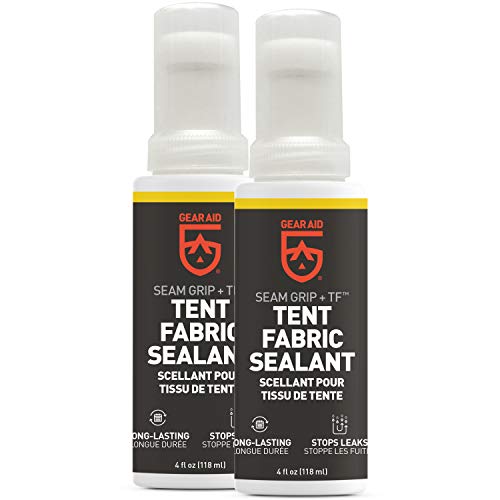
- Confirm substrate chemistry. Polyurethane-based sealer for cotton canvas, poly-cotton, and PU-coated polyester. Silicone-based sealer only for silicone-impregnated fabrics. Test: place one drop of water-thinned PU sealer on a hidden patch; if it beads and refuses to wet the surface, the fabric is siliconized and requires silicone chemistry.
- Remove failed seam tape completely. Peel with steady low-angle tension. Scrub residual adhesive with isopropyl alcohol and a plastic scraper. Partial removal leaves a weak boundary that the new sealer will delaminate from.
- Observe the environmental window. Apply at 18–24 °C with relative humidity between 40% and 70%. Below 15 °C, cure stalls and the film stays permanently tacky. Above 30 °C, the surface skins in under 2 minutes and traps uncured solvent beneath.
- Seal from the correct face. Rule: seal the side where the coating lives. On PU-coated fabrics that is the interior face; on bare canvas, seal the exterior where water first contacts. If in doubt and access allows, seal both faces — the penetration overlap through the stitch holes is what actually blocks capillary flow.
- Lay a controlled bead. Target a 1.5 mm wet bead centered on the stitch line, then brush out to a 25 mm total coverage width (roughly 12 mm either side). Use the supplied applicator brush or a 12 mm synthetic chip brush. Expected consumption: 20–30 mL per linear meter on cotton canvas, 10–15 mL on tighter poly-cotton.
- Work the sealer into the perforations. Brush along the seam, then make a short cross-grain stroke every 100 mm. The cross stroke is what drives sealer into the annular gap around each thread. A bead that merely sits on the surface bridges the holes without filling them and will fail inside two seasons.
- Prioritize high-stress zones. Give double attention to the wall-to-floor junction, hinge-adjacent seams within 150 mm of the fold, ladder-mount reinforcement, and window surrounds. These account for the large majority of real-world rooftop tent leaks.
- Seal zipper tape, never zipper coil. Apply along the stitch line that attaches the tape to the fabric. Sealer on the coil or slider will cement the zipper solid. Mask the coil with painter’s tape before application.
- Cure undisturbed for 24 hours at 18–24 °C, tent deployed and tensioned, out of direct sun. Touch-dry occurs around 2–4 hours, but full crosslink and elongation properties require the complete window. Folding at 6 hours will bond the panels to each other permanently.
- Dust tacky surfaces if required. Some sealers remain slightly tacky after cure. A light dusting of unscented talc on the cured bead prevents panel-to-panel adhesion in storage.
Phase 5 — DWR Reproofing & Verification (2 hours plus 48 h cure)
- Apply the reproofer to a clean, fully dry, deployed tent. Pump sprayer or garden sprayer at low pressure, 300–400 mm from the surface. Coverage rate for canvas typically runs 250–350 mL/mu00b2 — substantially heavier than synthetic tent fabrics, because cotton absorbs rather than coats.
- Use overlapping passes. Horizontal then vertical, each pass overlapping the previous by 50%. Work top-down so runs are absorbed by the still-dry area below rather than forming drip marks.
- Do not saturate to dripping. Over-application stiffens canvas, can produce blotchy patches, and in extreme cases blocks breathability enough to increase interior condensation.
- Respect the cure. Most canvas proofers require 24 hours touch-dry and 48–72 hours for full water repellency development. Heat-set products may call for a brief warm-air pass; follow the product label, as canvas tolerates far less heat than synthetic shells.
- Verify with a repeat flood test. Repeat Phase 2 exactly: 15–20 kPa fan spray, 10 minutes per panel, observer inside. Zero ingress at all previously marked points is the pass criterion. Any remaining seep means that seam was under-penetrated — reclean, redegrease, and reapply locally.
- Document for the maintenance file. Log date, products used, ambient conditions, and linear meters sealed. This record drives the reproofing interval in the next section and is genuinely useful at resale.
Tools, Calibration Equipment & Component Replacement
Our evaluation criteria for this category weight three variables: chemistry compatibility with cotton and poly-cotton substrates, retained elongation after cure (critical for the hinge zone), and UV stability of the cured film. Our technical assessment reveals that cost correlates poorly with performance here — the decisive factor is matching chemistry to substrate, not price per milliliter. For detailed technical setup and system integration, reference our analysis on mount rain gutter crossbars for 200-lb rtts (2026).
Diagnostic Instrumentation
- Pin-type moisture meter — the single most valuable instrument in this job. Target below 8% moisture content before any sealant or DWR application. Fabric-capable models with a 0–30% range are adequate.
- Infrared thermometer — verifies surface temperature sits within the 18–24 °C application window. Essential when working outdoors, where a shaded panel and a sunlit panel can differ by 25 °C.
- Hygrometer / thermo-hygrometer — confirms the 40–70% RH application window and supports the condensation-versus-ingress diagnosis in Phase 2.
- 10× loupe or macro-capable phone — for inspecting thread condition, needle hole gape, and hairline cracks in cured sealant film.
- Fan-nozzle hose or pressure sprayer capable of a controlled 15–20 kPa output for repeatable flood testing.
- Digital calipers — useful for verifying bead width and confirming the 25 mm coverage target rather than eyeballing it.
Chemistry & Consumables
- Polyurethane seam sealer — the default for cotton canvas, poly-cotton, and PU-coated polyester. Look for stated elongation above 300% and UV stabilizers. Budget one 60 mL tube per 2–3 linear meters of canvas seam.
- Silicone seam sealer — mandatory for silnylon and silpoly panels. Chemically incompatible with PU; never mix on the same seam.
- pH-neutral technical fabric cleaner — surfactant-free, no optical brighteners, no softeners. Non-negotiable.
- Canvas-specific DWR reproofer — water-based fluorocarbon-free or silicone-based formulations suit cotton. Verify breathability retention on the label; a fully occlusive coating converts a leak problem into a condensation problem.
- Urethane coating restorer — for interior PU films showing hydrolysis. Applied after stripping degraded coating with isopropyl alcohol.
- Isopropyl alcohol, 70–99% — seam degreasing and tape-residue removal.
- Self-adhesive repair tape and fabric patches — for pinholes and abrasion damage, applied before sealing so the sealer bonds over a continuous surface.
- Unscented talc — anti-tack dusting for cured beads.
- Nitrile gloves, respirator for solvent-based products, low-tack masking tape, 12 mm synthetic chip brushes, lint-free cloths.
Component Replacement Thresholds
Sealing is not always the right answer. Replace rather than treat when: thread has degraded to the point that a seam opens under light hand tension (restitch the seam before sealing, as sealant has no structural strength); interior PU coating has hydrolyzed across more than roughly 30% of a panel (full recoat or panel replacement is more economical than patchwork); mildew has weakened fabric such that it tears under 50 N hand pull; or UV degradation has reduced the canvas to a chalky, brittle state where fibers powder when rubbed. A tent at that stage will leak through the fabric body regardless of seam work.
Product Selection by Substrate
| Fabric Substrate | Seam Sealer Chemistry | Reproofer Type | Typical Coverage | Reproof Interval |
|---|---|---|---|---|
| Cotton duck canvas (280–400 gsm) | Polyurethane, flexible grade | Water-based canvas proofer or wax emulsion | 250–350 mL/mu00b2 | 12–24 months |
| Poly-cotton ripstop (260–320 gsm) | Polyurethane, flexible grade | Water-based DWR, breathable | 180–250 mL/mu00b2 | 18–36 months |
| PU-coated polyester (rainfly, annex) | Polyurethane | Spray-on DWR | 120–180 mL/mu00b2 | 24–36 months |
| Silicone-impregnated nylon/polyester | Silicone only — PU will peel | Silicone-compatible DWR | 100–150 mL/mu00b2 | 36+ months |
| Hinge and high-flex zones (any substrate) | High-elongation flexible, >300% retained | Match base panel | Double bead, 2 thin coats | 12 months — inspect each season |
Preventative Maintenance & Long-Term Reliability Protocols
Rooftop tents endure a duty cycle no ground tent sees: continuous UV exposure while stowed, highway-speed airflow loading, thermal cycling between a 60 °C sunlit roof and sub-freezing nights, and compression folding that abrades the same crease lines every single time. We analyzed the failure patterns reported across owner communities and manufacturer service guidance, and the pattern is consistent — the overwhelming majority of premature canvas failures trace to packing a damp tent, not to inadequate waterproofing chemistry.
The Dry-Pack Rule
Never close a rooftop tent on damp canvas. Mildew colonizes within 24–48 hours at above 20 °C in an enclosed shell, and once established it degrades cellulose irreversibly while simultaneously destroying the DWR layer. If you must break camp wet — and on a trip you often must — redeploy within 24 hours and air-dry fully. If weather prevents redeployment, open the tent in a garage with a fan running. This single habit extends canvas service life more than any product you can buy.
Scheduled Maintenance Intervals
- After every trip: brush off debris, confirm the tent is bone dry before closing, inspect the cover for tears, and check that the ladder mount hardware is torqued to the manufacturer’s figure (commonly 8–12 Nu00b7m for M8 fasteners — always verify against your specific model’s documentation).
- Every 3 months or 10 nights of use: deploy fully, run the five-point bead test, and visually inspect all high-stress seams under magnification. Catching a 50 mm section of lifting sealant costs fifteen minutes; catching it after a season costs a full reseal.
- Every 6 months: full deployment for 24–48 hours of airing, even if unused. Prolonged folded storage sets permanent creases that fatigue the coating along the fold line.
- Annually: deep clean with pH-neutral cleaner, spot-reseal any seam failing the flood test, and reapply DWR to high-exposure panels (roof and the sun-facing wall), which deplete roughly twice as fast as shaded surfaces.
- Every 2–3 years: complete reproof of the entire shell plus a full seam inspection and reseal of all high-stress zones.
UV Management
Ultraviolet exposure is the dominant long-term degradation vector for a permanently roof-mounted tent. UV photodegrades the fluoropolymer or silicone DWR chain, embrittles polyester thread, and breaks down cotton cellulose. Practical mitigation: keep the travel cover fitted whenever stowed and replace it when it loses its own water repellency; park in shade or under cover when practical; and if the vehicle lives outdoors year-round, consider a UV-protectant fabric treatment on the cover itself. In high-UV regions, expect to compress the reproofing intervals above by roughly a third.
Condensation Control
Two sleeping adults exhale roughly 0.5–1.0 L of water vapor per night. In a sealed 2–3 mu00b3 rooftop tent volume with cold canvas walls, that reliably reaches dew point. No amount of waterproofing addresses this — in fact, over-proofing to the point of blocking fabric breathability makes it measurably worse. Keep at least two vents cross-opened even in cold weather, use an anti-condensation mat beneath the mattress to allow airflow under the sleeping platform (trapped moisture under a foam mattress is a classic mildew incubator), and wipe interior walls dry in the morning before packing. Owners who seal aggressively and then ventilate poorly end up convinced their reseal failed when the tent is, in fact, perfectly watertight.
Off-Season Storage
Where storage conditions allow, remove the tent from the vehicle for long layups. Store it clean, bone dry, and loosely folded — never compressed — in a cool, dry, dark space at 10–20 °C and below 60% relative humidity. Avoid sealed plastic bins, which trap residual humidity against the fabric. A breathable cotton or canvas storage bag is the correct choice. Before the first trip of the season, deploy for 24 hours, run the bead test, and inspect seams. Discovering a cracked hinge seam in your driveway is a minor inconvenience; discovering it at 2 a.m. in a thunderstorm is not.
Frequently Asked Questions
Can I use beeswax to waterproof canvas rooftop tent seams instead of modern sealer?
Beeswax and paraffin-wax dressings are a legitimate traditional treatment for heavy cotton duck, and wax does have a genuine advantage at seams: it stays pliable and resists the flexural cracking that kills rigid films at hinge lines. The practical objections for a rooftop tent are weight, heat, and reversibility. A wax treatment adds roughly 100–200 g/mu00b2, which on a 12 mu00b2 tent means 1.2–2.4 kg added to a roof load that is already constrained by your vehicle’s dynamic rating. More seriously, wax softens and migrates above roughly 40 °C — well within the range a closed rooftop tent reaches in summer sun — producing staining and uneven coverage. Wax also reduces breathability more than a modern water-based DWR, which raises condensation. And it is effectively permanent: once waxed, a canvas will not accept a modern DWR or PU sealer without aggressive solvent stripping. Our technical assessment favors wax only for traditional ground-mounted canvas wall tents, not for rooftop installations. If you want wax specifically for its elongation behavior at hinge seams, a high-elongation flexible polyurethane sealer delivers the same crack resistance without the thermal and weight penalties.
Why does my tent still leak at the seams after I applied seam sealer?
Four causes account for nearly all post-treatment failures. First, surface bridging instead of penetration — the bead was laid on top of the stitch line without the cross-grain working strokes, so it spans the needle holes without filling the annular gaps. Water still wicks through the thread channel beneath an apparently perfect film. Second, contaminated substrate — sealer applied over dirt, silicone mold release, or residual detergent surfactant bonds to the contaminant layer, not the fiber, and delaminates within weeks. The isopropyl degreasing step in Phase 3 exists specifically to prevent this. Third, chemistry mismatch — polyurethane on a siliconized panel will peel off in sheets no matter how carefully applied. Fourth, wrong face sealed — on PU-coated fabric, sealing only the exterior leaves the coated interior face as the actual barrier plane, and water that enters the weave travels laterally before emerging. Also verify you are chasing a real leak: re-run the Phase 2 flood test with an observer inside. If moisture appears uniformly across cold surfaces with no seam correlation, you are diagnosing condensation, and further sealing will make it worse. For detailed technical setup and system integration, reference our analysis on prevent under-mattress condensation in rtts (2026).
How long should I wait between sealing seams and reapplying the DWR coating?
Seal seams first, let them fully cure, then apply DWR. Minimum 24 hours of seam-sealer cure at 18–24 °C before the reproofer goes on; at temperatures between 15 °C and 18 °C, extend that to 36–48 hours. The sequencing matters because DWR lowers the fabric’s surface energy by design — apply it first and the seam sealer will bead up and refuse to wet the stitch line, giving poor penetration exactly where you need it most. After the DWR application, allow a further 24 hours touch-dry and 48–72 hours for full repellency development before the verification flood test. Testing too early produces false failures, because the DWR film has not finished crosslinking and orienting. Total realistic timeline from first deployment to a verified-dry tent is three to four days, most of it unattended cure time. Plan the work for a dry weather window rather than rushing it before a trip — a half-cured sealant job performs worse than no job at all, because it bridges the seam without sealing it and masks the problem until the next storm.